Technical Advice
Terracotta Tiles
Terracotta tiles need to be sealed.Our very basic advice is STICK - SEAL - GROUT - POLISH .
What kind of adhesives do I need? Terracotta tiles are fairly rudimentary in their construction and do not require a hi-tech modern adhesive.A standard dry cementicious adhesive will suffice.The final choice will be determined by subfloor and timescale as to whether it needs to be flexible or fast-setting. Fix to a thick solid bed of adhesive so allow about one 20kg bag per 3.5m2. Depending on the screed (ie anhydrite) or subfloor (ie timber) primers may be required. We do not suggest fixing with sand/cement as it introduces a large quantity of water that has to dry out through the tile (unlike proprietory adhsives).
How do I cut Terracotta tiles? We would normally suggest an electric tile saw but an angle grinder is fine as long as you can work outside. A conventional score and snap floor tile cutter will not be sufficient.
What is all this about sealing terracotta? Terracotta tiles are porous. The traditional impregnating fluid is boiled linseed oil. This soaks into the product, hardens, reduces porosity and generally enhances the colour and appearance of the tile. Linseed oil can be initially diluted with white spirits or used neat. You normally need to apply more than one coat and sometimes as many as four or five to saturate the tile. The number of coats can vary from tile to tile, so do not allow any excess to dry on the surface. If it looks like it is not soaking in do not assume that it will. Remove, disperse or thin with a cloth and/or white spirits. Dispose of oily rags carefully, they can combust. There are a number of proprietory sealers on the market that can be used on terracotta but their cost and consumption rate often means that insufficient quantities may end up being used.They may be considered for smaller areas where a possible aesthetic look (for example very pale) is required.
Can I pre-seal the tiles prior to laying? We often get asked this one. In theory you can but our advice is that it will invlve a lot less handling if the tiles are sealed once fixed.Also you can see what you are doing and correct any mistakes promptly. So we would only suggest if it really works in with your schedule.
What is the best way to apply the oil? You can use lint free cloths or a paint brush if you work carefully be we would normally recommend a sponge or a sponge roller for larger areas.The oil is best decanted into a smaller container.Avoid dribbles and splashes and work steadily and systematically and whatever you do establish a technique in a discrete area before you commit to the whole floor.
How much linseed oil do I need? We would normally suggest allowing about 5l for 15m2 however this will vary with the particular tile and also application rates.Spanish Terracotta is less porous than Mexican.Lots of thinner applications,well spaced apart will reduce consumption but may not be practical.More generous applications closer together will increase consumption.if it is available locally you can order conservatively but if it has to be couriered it may be best to order more generously.
How many coats do I need? Again it will vary on the terracotta and how it was applied.The idea is to work in as much as possible without creating an excess on the surface. It may also depend who is doing the grouting. It is imperative to have sufficient protection on the tile prior to grouting. Experienced tilers may be able to squeegee grout off a surface that an enthusiastic diy-er struggles with. remember the golden rule...Establish a technique in a discrete area before you commit to the whole floor. If the tileris doing th etiling and the client is doing th esealing you may then be able to work in another coat after the grouting. We would not suggest oiling th egrout.You can get sealers that can be applied to the grout if required.
Anything I should know about grouts? Again no need for one of the technical grouts that line the shelves of diy stores,you just need an old-school fairly coarse textured wide joint floor grout.. Normally these are readily available in grey.Sandstone grout was a popular colour choice but is harder to track down at a sensible price these days.Depending on grout width allow one 20kg bag per 7-8m2. Flexible additives will be needed for timber or heated subfloors in which case check you can clean off the residue as the flex is almost like adding glue to the grout. In our entirely non techical opinion the amount of additive required for a heated floor is not as much as with a timber floor. If you are feeling creative you can make your own grout using sand and cement.Coarser sands will create a more traditional look and a white cement will lighten the colour.This requires some experimenting and keep an eye on th eratios as you work.And it is usually pointed rather than spread/slurried over the floor.
Grout joints should be around 10-15mm so you will not need or get spacers.Do it by eye or improvise some noggins out of wood or similar.
OK,so the grout is dry,cleaned off and dusted,what next? In theory you can now apply a final polish or wax coat. You could always see if th efloor will take another coat depending on how mauch has been applied so far and if time permits and you check for any surplus residue,no harm. But basically it is now a time to apply either a wax paste which needs polishing or a self drying liquid polish.
Regular cleaning should be with Easycare or Waxwash.
Tiling in demanding locations
INTERNAL.
- Commercial applications For information about commercial areas we will normally require fairly precise information due to the wide variety of requirements. Please contact a member of staff for full details.
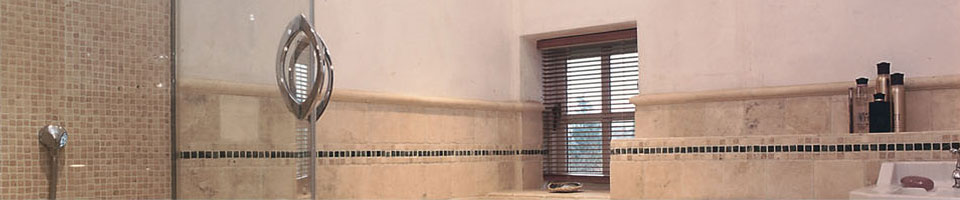
- Wet areas and Bathroom Tiles. As a general rule of thumb we make a distinction between tiling around general wet areas (e. g. bathrooms with or without showers) and more demanding applications such as dedicated or enclosed showers. Most of the products we sell as wall tiles including e.g. Mexican and Moroccan wall tiles, and most natural stone tiles are suitable for tiling in general wet areas. Crackle glaze tiles will probably require a simple'wipe-on, wipe-off' sealer. The only proviso is that the area is correctly prepared to take tiling: A good quality adhesive is used and the adhesive is applied as a solid bed without voids behind the tiles. Where possible, a grout with waterproof additive should be used and, where appropriate, a sealer should be applied to the tiles. Joints should be finished with a silicon sealant.
- Dedicated Showers create a more demanding environment for tiles. To this extent we may not recommend certain more rudimentary handmade tiles and may suggest that extra precautions be taken with most natural materials. Modern power-showers can generate extreme demands on tiles and therefore we may be cautious in our recommendations about what tiles should be used and, we also recommend that every precaution be taken to ensure that the whole system doesn't fail. The old adage that a fault costs five times as much as doing the job correctly to start with is as true about showers as it is true about anything.
- Our general guiding principle with showers is to suggest that customers ensure that the structure is as waterproof as possible prior to tiling. It is very easy to install some perfectly adequate tiles onto a porous plasterboard background and for water to find its way through a pinhole in the grout round the back of the tiles and for the plasterboard to break down and the tiles to eventually lift off. There are a number of ways of avoiding this scenario:
- Tile boards There are a number of proprietary boards designed to receive tiles. These are variously known as 'aquapanel', 'weddiboard' and 'tilebacker board'. The advantage of these materials is that they are specifically designed for tile installation and are dimensionally inert in moist or wet environments.
- Waterproof membranes There are a number of products available using acrylic-based flexible coatings and polyester mesh. The advantage of these products is that they can be applied over existing boards. In principle one could use these products to create a waterproof cardboard box. For more information, contact BAL on 01782 591 100. A kit for an average shower is about £60. If this is used with BAL adhesives and grouts BAL will offer a 10 year guarantee on their products Adhesive manufactrers are notoriously circumspect in their recommendations, but at the very least in the event of a wet area failure one should be entitled to an independent inspection. BAL currently market a product called Mosaic Fix which, despite it's name, is in fact a white, waterproof, flexible adhesive which will fix mosaic, wall tiles, porcelain and stone tiles to all standard bathroom surfaces, coverage is approximately 8-1m per 20kg bag. £26 +VAT. Highly Recommended.
EXTERNAL.
Our Terracotta tiles are not rated for extenal use.If the application is sheltered with low frost risk by all means contact us and we can discuss.
UNDER-TILE AND UNDER-FLOOR HEATING.
Advice on the suitability of tiles in relation the both 'wet' or piped under-floor heating and electric under-tile heating is subject to a variety of opinions and one cannot rely on a definitative statement from the British Standards Institute. We have found that the best advice is available on a (lengthy) pdf document at the Tile institute, but as there is a charge for it we have summarised most of the conclusions. . It does not however resolve the issue as to how far the aesthetically more pleasing de-coupling mat is an alternative to mid-floor(as distinct from perimeter) expansion joints. At the moment we would rather customers contact us for advice. The main points we tend to draw to peoples attention are:
1. Electric under tile elements/mats impose no stress load on the screed . You may need to consider an insulating mat underneath to reduce heat loss downwards.
2. A heated screed does impose additional stress on the screed, particularly in large continuous areas or at thresholds. Expansion joints are the way round this but if this seems unappealing, at the very least the screed should be gently warmed through and allowed to cool down over a period of weeks to expose any potential cracks PRIOR TO RATHER THAN AFTER tiling
3.Larger areas will magnify the different expansion rates of the subfloor and tiled surface.
4.Large formats tiles will increase the requirement for expansion joints.
5. Remember, Anhydrite or Pumped screeds are quick to install but slow to dry. They also need priming prior to tiling.
6. Decoupling mats may seem expensive, but they do isolate the tiles and th esubfloor from any HORIZONTAL movement caused by heat stress or shrinkage. They also allow a more even dissipation of heat. Correctly installed they do give peace of mind.
7. It sounds obvious AFTERWARDS but not so obvious beforehand, but a rug or carpet over heated tiles can lead to differential heat loss and possible stress fractures.